


Procedural Animation in Rive: How To Engineer a Dynamic Character
Take a non-linear approach to character animation.


Imagine a character that looks around naturally, reacting in real-time, with no pre-rendered sequence. How we did it? A Rive project; containing 63 state machine layers, 114 events and 245 timelines to create over 90,000 animated sequences. All within a singular artboard and a file size just shy of 10MB—no code needed. Rethink animation with us—step beyond the timeline and into the world of procedural animation: Welcome to With Love Labs!
Over the past year and a half, we’ve mastered Rive to uncover the best ways to bring our digital characters to life. Along the way, we hit key milestones—each marked by a version number—that mapped our progress:
Version “1.0” was highlighted by its lower frame rate and unique animation style. This is where we found how to set up our state machine for triggering poses in-app, which still applies today!
Version “2.0” doubled the amount of animation in the project and added a new framework for how to sequence poses together. All timelines were rebuilt for a higher framerate, as we continued to develop our style.
Version “3.0” — currently live on the Appstore — is when our technical abilities allowed us to fully explore the vision we had for the platform. A new system was born featuring uncapped framerates and fully procedural, context-driven animation, built directly inside Rive’s editor.

This journey started with just wanting our characters to stop feeling like robots. So, we turned Rive into something wilder than we could ever imagine. Reshaping stiff, repeating loops into fully interactive environments. Unlocking the depth of Rive’s toolkit to transform three seconds of animation into an endlessly unique experience filled with memorable moments.
Here’s the thing: 'procedural', to us, isn’t just adding some variety or stitching a few timelines together in random ways, it’s more like teaching a puppet to improvise—to blink, glance, and move like it has a mind of its own. You really need to live in their world for a moment and consider how you would think, react, and move. For instance, if you were writing a letter, and a picture frame on your desk suddenly flew into the air, you’d probably stop writing for a second too!
Sequence-Based vs State Machine-Driven
At its core, most digital animation is just a bunch of keyframes laid out across a Timeline.
You play it and you’ll get the same thing every time. This is also a convenient way of describing Sequence-Based Animation, where timelines are played in a fixed path (e.g., A → B → C). It works well for animated films and TV-series, but can start to be limiting once you step into real-time mediums such as apps or games.
Let’s say you were given a single timeline and tasked with creating an idle loop for a video game character. You, being the brilliant animator you are, don’t want to create a boring three second loop!

So, you extend your timeline out to nine seconds, duplicating the animation a couple times, and create an expressive, looping masterpiece. It has a non-uniform blink cycle, offset movements between each loop and a full second animation at the end to spice it up. This could be considered a best-case-scenario for this method, and yet it can still fall short to the skeptical eye.
Any character animation that repeats itself in the same exact way can give off the vibe that they are just not real. The illusion breaks once you discover where a loop happens and you’re taken out of the world for a moment. There should be a level of unpredictability, nuance — something needs to make you believe the character had an actual thought behind that action. This is a near impossible task to pull off with a linear approach, as people live in a constant state of change, not prewritten choreography.
The Non-linear Approach
To step outside of this fixed path, we must introduce the State Machine! It’s a method where animations transition between states based on conditions. A common use for this would be how characters are able to run in video games. You press ‘w’ on your keyboard and the character transitions from idle → running and when you release ‘w’ it goes from running → idle. This is in contrast to a linear method as you’re not committed to a single path, you’re able to transition between multiple.
Despite this example being non-linear, it still lacks depth. If every time you go to run and the same thing happens, it’s not too different from a premade sequence. Instead of the timelines being ordered from A → B, like in a movie, they’re now just jumping between A → B → A → B as you go from idling to running back to idling.
To make this more dynamic you would need to set more conditions to that transition and maybe even create more animations to transition to and from it. What if there’s an obstacle in front of the character? What if they have too much in their backpack and it weighs them down? If they’re still able to run in these situations, it might break the illusion for that player.
This leads us to Procedural-Based Animation. It’s a state machine with a more adaptive system where transitions, states or even entire animations are generated or modified on the fly.

Compared to traditional state machines, which rely on predefined states and fixed transitions, a procedurally-based one adds rules, algorithms, or real-time data to dynamically alter its output. In other words, instead of your character simply running every time you press ‘w’, they will react based on context. Going up a steep hill? The character might walk instead. Facing a wall? The character might not move at all. The same thing doesn’t happen every time because instead of one condition, there are many.
Building the Foundation
We’re committed to bringing character to your life, and Rive is the tool we use to do that! You don’t need to be a savant, but beyond this point we’re assuming you have some understanding of how Rive works. If this is your first time hearing about a State Machine, start with this Rive 101 playlist on YouTube.
Before we started the procedural part of our state machine, we had to establish the core features it would govern: the inputs that would serve as the foundation for applying these conditions. Since the goal was to create a lifelike character, and with the endless amount of variables that could make up a lived experience, we needed a framework that gave direction to our system. We found that framework to be rooted in awareness, since one’s entire experience could be defined by how they perceive and interpret their environment.
We brainstormed how and when this awareness shows up, through:
body language
speech
eye contact
responsive actions
Using these as a guide, we built out a variety of poses, gestures and expressions for body language, designed talking and non-talking states for speech, mapped out eye directions for eye contact and created an entire environment with objects for the character to react to. After this, we were left with five inputs to build conditions from, as well as inputs for each pose so we could transition between them.

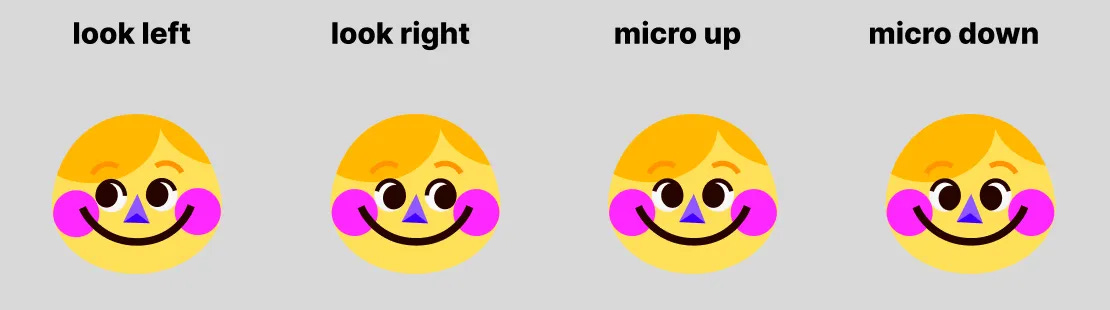
The five universal inputs we landed on were: talking, not-talking, left-focus-eyes, right-focus-eyes and center-focus-eyes.
We needed to take into account how these inputs would be applied to the character’s design. We animate our characters using rigs. Due to the wide range of designs, each pose required it’s own rig, with it’s own art assets. So, to guarantee the systems being built could apply to every pose, we needed to find the things they had in common: the eyes and mouth!
We classified these inputs as system-wide because their associated timelines included assets from every pose. In contrast, inputs for individual poses were classified as pose-wide, as their associated timelines only involved assets specific to that pose. This naming convention was important to prevent layer conflicts, where an object is controlled by more than one layer of a state machine, leading to only one effecting that object.
Getting Procedural
Now that we had the inputs in place, and a rough idea of what we wanted them to do, it was time to lay the groundwork for when, and how, they would trigger. Before getting too deep into things, it was important we had a clear understanding of the logic that would be driving these systems.
The First System
The first one we tackled was managing the eyes. They really are the window to the soul, so much of what someone is feeling can be revealed in just a single glance; it was obvious to us this was the place to start. Everything we learned while engineering this became a guide for how we would approach the other systems down the line.
Getting a character to blink isn’t as simple as just playing the animation randomly every few seconds. We know this because that’s exactly what we did on our first attempt! The results were a face that felt robotic and, at times, disconnected from the character’s own action. When done naturally, blinking isn’t something you’re really aware of but, if handled the wrong way, can become overtly uncomfortable. One example would be whenever GoodGood shifted his gaze and didn’t blink. It’d be like talking to a friend who glanced to the side and returns to meet your gaze—eyes open, never having blinked once. Or imagine someone sneezing without blinking. Trust us, you’d notice that!
Procedural animation isn’t just chaos—it’s context. A blink isn’t random; it’s a reaction, driven by intention.
It became clear to us that we needed a way to layer intention into the systems we were building. So, we made a list of the moments where blinks needed to happen: while changing eye direction, transitioning between poses, and during large movements, like sneezing. Knowing this, we now need an actual way to create these connections. How do we know when GoodGood is doing a ‘large movement’ and then, while this animation plays, get that blink to happen? In other words, this means building systems that can retrieve data, at the right time, and trigger the desired outcome.

The Blink
Our first pass at the eye system was a just single layer, in the state machine, that used transition randomization to play a timeline that held the blink animation. With only this setup, we would not have been able to communicate with anything happening outside of that layer.1 We solved this by creating ‘functions’ that could be effected by the state machine from anywhere in that project. Using this technique, we were able to recreate that system to have those moments play the blink animation. To learn more on how we achieved this, in-editor, check out "The Power of ‘Functions’ in Rive: Learn to Automate Your Workflow”.
Now, the only times he would blink would be in that short list of moments we assigned this ‘blink’ function to. Sadly, after watching the playback long enough, it would become too predictable, and in poses where those large movements and eye direction changes didn’t exist, he stopped blinking altogether. This is what sparked a “proverbial light bulb moment” for us. We could connect both of these systems.
Instead of only manually assigning each blink through this new function, we could combine it with the earlier system to have it trigger randomly as well. We went back, connected the first pass to the blink function, pressed play, and—like magic—it felt real. GoodGood was looking back at you with what felt like a natural, blinking eye.
He would blink in the moments you would expect, but now there was something else happening. It was subtle, but at times there was a glimmer of what felt like a thought behind those eyes. Like he had the actual thought to blink there. Not a just simple reaction, but an intention. It created a blurred line of not knowing what was going to happen, while still being grounded in something familiar.

For some, even the simplest blink can be enough to create that illusion of a conscious being. You might not have noticed a random blink—it’s just a blink, after all. But for us, the ones who built the interaction and understood how it worked, it was exactly the kind of experience we needed to share in that moment of wonder. To us, this is what it means for a system to be procedural.
We called this sweet spot ‘Considered Randomness’ and used it as the benchmark for systems to come.
And more systems did come! He can glance, look around, talk to you, type on his computer, write you letters, and so much more. We may share how we built these other systems in the future, so don’t forget to subscribe to With Love Labs’ newsletter to get updates straight to your inbox! 〠
The Secret to Real-Time Animation in Rive: Good Project Management

As runtimes, deadlines, and creative sprints coalesce amongst a small batch of talent, our team was faced with pushing the boundaries of Rive — as well as time — to build out animation systems that delivered phenomenal visuals at a fraction of the file size. At the backbone of it all lies project management, the hidden hero that turns creative chaos int…
Technically, we could’ve set things up for a developer to manage on runtime.
We didn’t go this route because we found our no-code solution, where everything is managed directly in Rive’s editor, to be the best for efficient, creative output. The people animating the scenes are also creating the systems that drive them.
We call this process “Animation Engineering”, and the role an “Animation Engineer".