


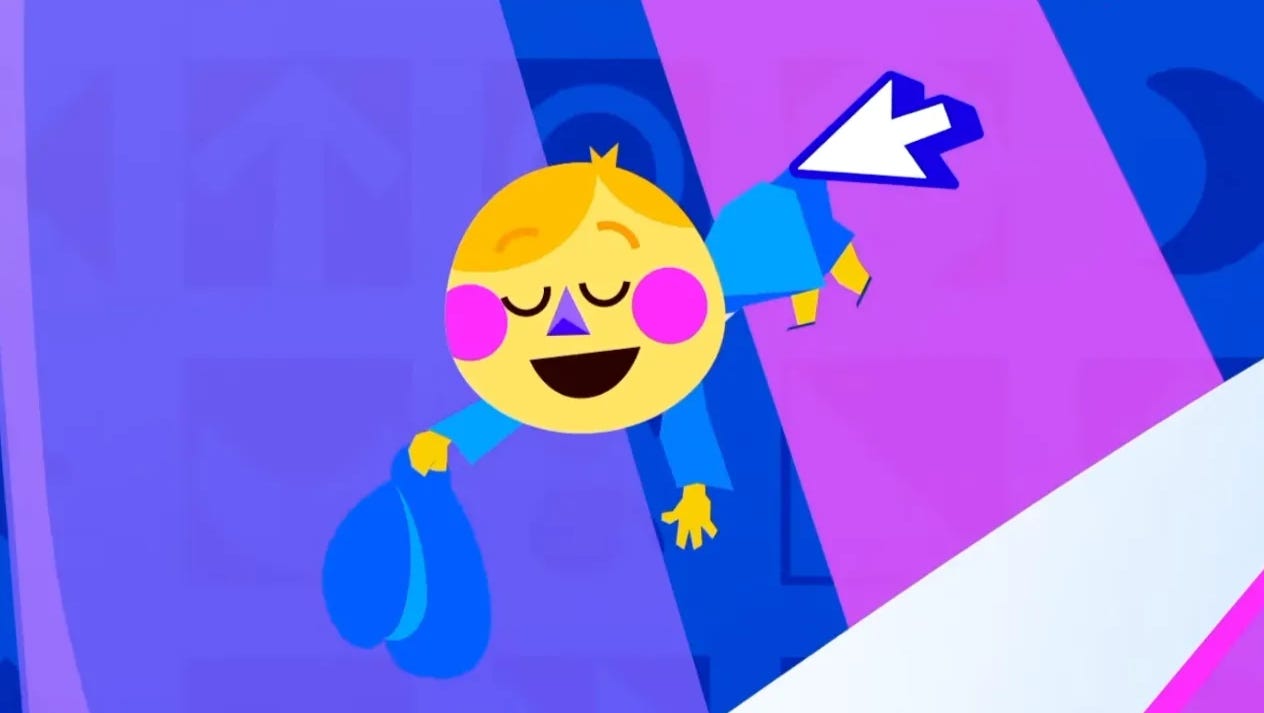
The Secret to Real-Time Animation in Rive: Good Project Management
Complex systems deserve considered thought.


As runtimes, deadlines, and creative sprints coalesce amongst a small batch of talent, our team was faced with pushing the boundaries of Rive — as well as time — to build out animation systems that delivered phenomenal visuals at a fraction of the file size. At the backbone of it all lies project management, the hidden hero that turns creative chaos into seamless storytelling.
Why Choose Rive?
Our team found that in using real-time animation we could fold in small details, customizations, and interaction, all with the freedom to use an uncapped frame rate when pushing our App ‘With Love’ to any device.
Over the course of a year and a half, With Love Lab whipped up a “preshow” short, an intro musical number, a 2D + live action hybrid trailer, and three versions of a character state machine (carved out of procedural animation systems) that layer considered randomness atop a plethora of poses to create a variation of movements, all in Rive.
With so many projects all published in little over a year of production, our team of animators (team meaning two) worked with a total of 247 poses, building out a procedural animation system that could churn out over 90,000 variations all for one character!
Each deliverable faced it’s own set of challenges, layering on constraints that ultimately carved out our internal guidebook for best practices. With so many technical projects it carved out a new title for our team all together:
Animation Engineers.
Our animators had to do more than simply make the character move: their roles revolved around technical support, troubleshooting constraints, rigging logic, state machine structuring, on top of delivering a final product that fit the mission and appeal of the project with indicated parameters to hand off to developers. Knowing not just the inner workings of the project and it’s objective, but also understanding Rive enough to organize it all.

Our Animators realizing they were becoming EngineersIn this article, we’ll touch on how this new title came to be. We’ll navigate through a written timeline of learned production experiences, diving into the hows and whys of ways to organize files, think through pre-production, break down constraints, and problem solve performance issues — all in Rive.
Managing the Madness
Setting up the production pipeline proved to be one of the most important building blocks in each project. Using Notion to better delineate file specifics, our team broke up each project within a Notion page that cross referenced core details our developers would need to implement the runtime.
We would then host the link to our most recent .riv on each page so that any updates or finalized files could be all in one place. Recent backups of each file were nested in Google Drive and then placed there as well to keep work history current in case of crashes or unaligned updates.

Example of Notion Page OrganizationThis page also hosted an API for both animators in-editor and developers interacting with the runtime. Having an internal library of definitions driven by it’s purpose for each Rive file helped sew together the creative and logical side of what the animators were engineering in a visually organized guide that could grow with the project.

List of concepts used internally for inputsNaming conventions and how they transferred between Rive and developer needed to be clear in order to implement. As we progressed with each project — specifically building out our huge procedural character state machine — it was extremely important to understand how the animation timelines related to their triggers, what was happening, and why.


Example tap-lamp input with it’s API influence and purposeWhen it came to organizing tasks—for example, our animations—our pose organization took the shape of tiles, ranging in progress states; this way revisions could be tracked for each pose and assigned to an animator.
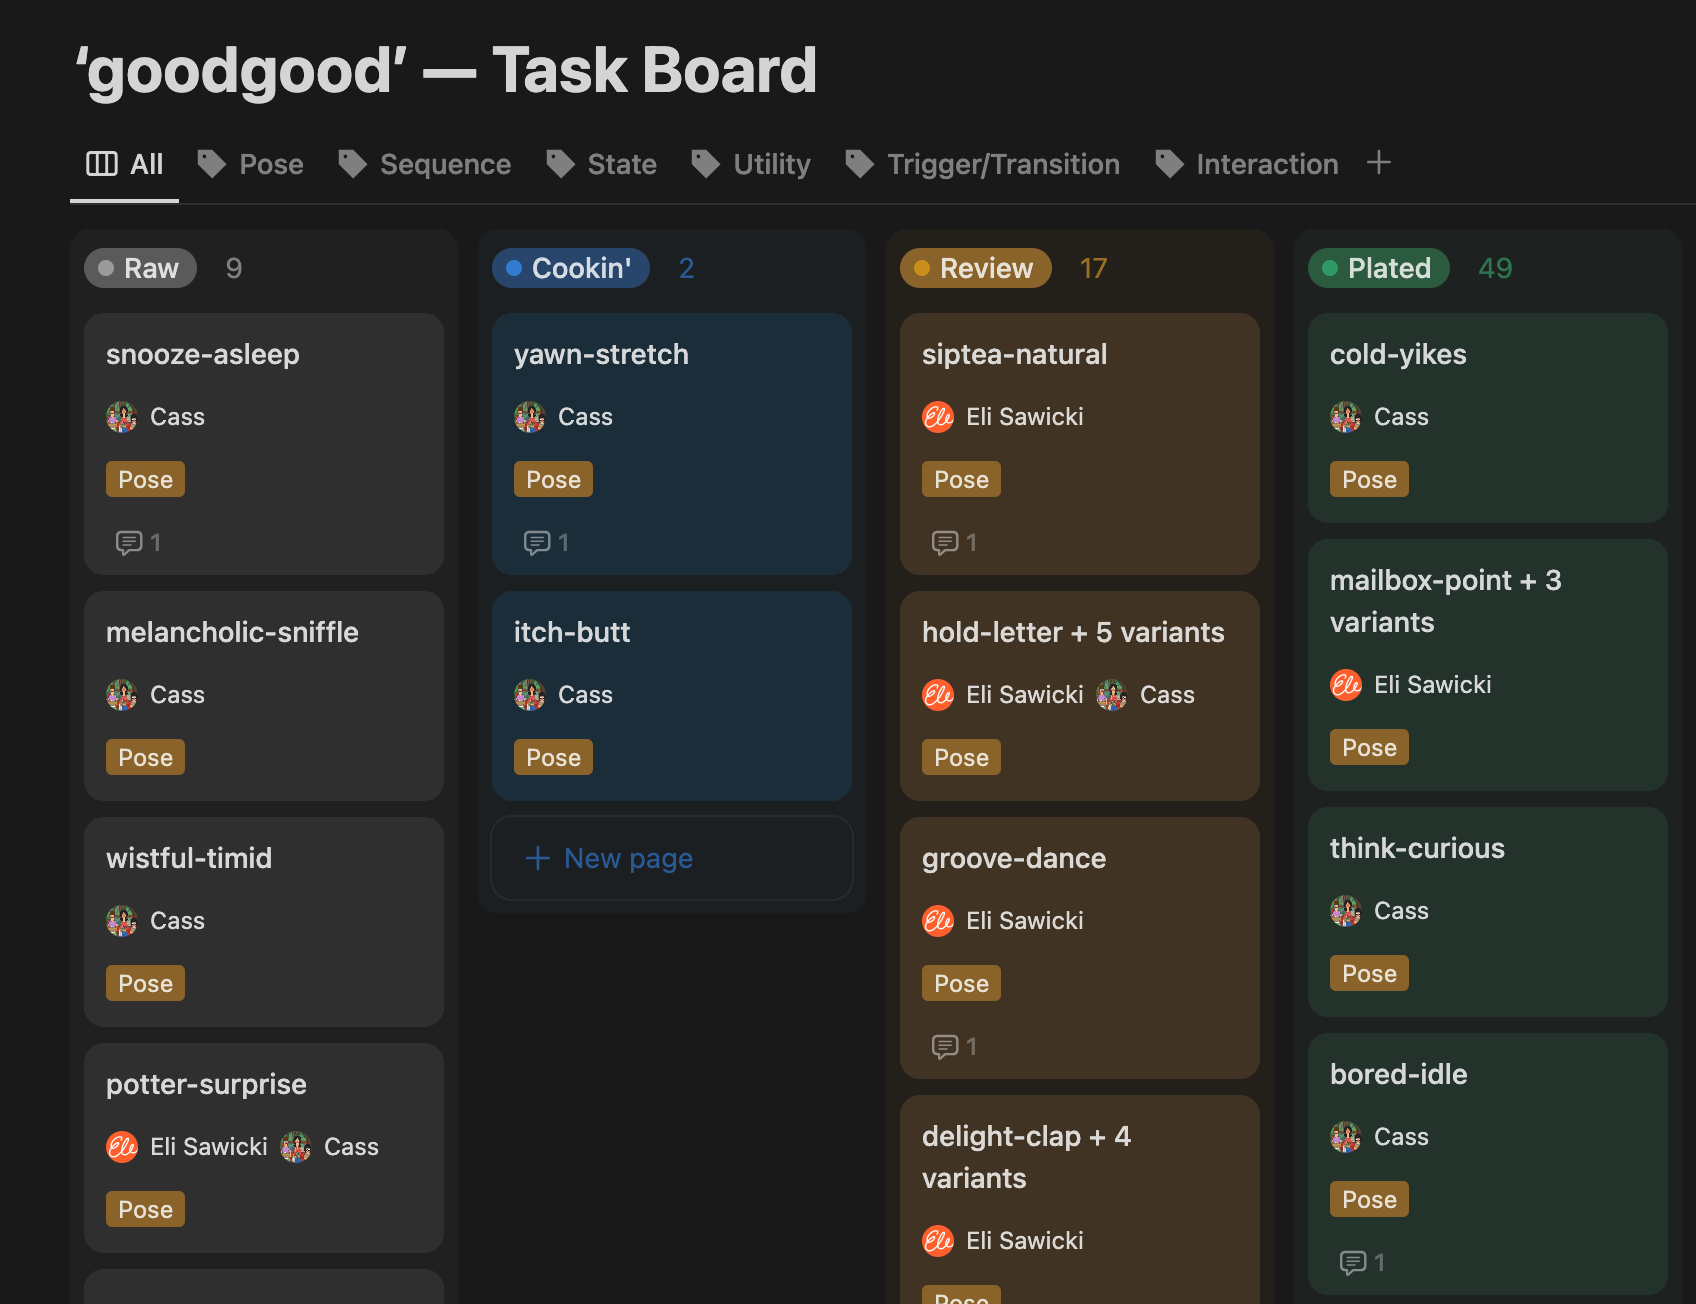
Tiles could be given to an animator, assigned an input, and broken out with pose specific feedback for edits. This helped track production, but also kept revision notes organized.Using Notion as a production pipeline tool helped mitigate confusion between animators and developers through creation and delivery. Developers didn’t need to go searching for answers, triggers, or sizing. When inputs and animations were added or updated, Animation Engineers would update the status of an item to reflect what was needed from a development side.
An example of this occurred when expanding our version 2 to version 3 character state machine. As we expanded poses and added more emotions, developers needed to know what was new and what had been updated within their code to trigger the file states.

Example of inputs that were used to communicate what devs needed to knowRigging Logic
Using Figma as a tool to create and organize poses, we broke out character states into applicable input names, denoting whether they made up a sequence or a stand alone pose. Our biggest bottlenecks proved to be considering constraints and expectations for a state machine’s execution, as well as the grouping associated with each rig.
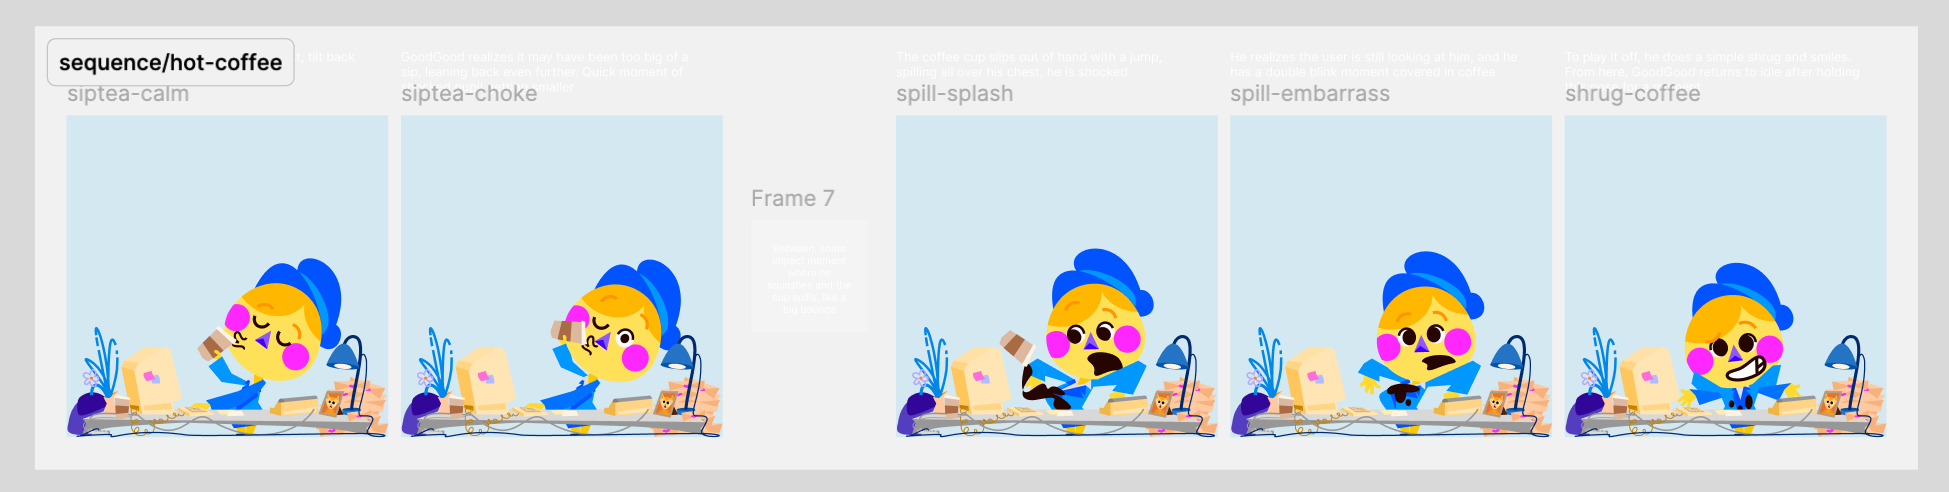
Example: sequence/hot-coffee pose organization in FigmaWe had to think about not only how the character moved, but what motions lived within its pose. How could we combine pose attributes—meaning different hands, arms, expressions—into solo layers, or plan out sequence logic with multiple poses in one file to transfer over into Rive.
Rive’s groups are absolute rather than relative; meaning you have to think through your state machine implementation logic before starting to animate; ensuring the anchor points aligned, and respective groups within a rig were planned was crucial.
On top of this when building out a procedural system, we faced a greater challenge: how could we set these systems up with room to grow?

Example of building out Rigging Logic: sequence/send-letter made up of 4 poses only has to be 2 rigs with a solo layer attribute swap because the base —i.e torso—only changes twice

finished-letter_review sequence made up of 2 poses has to be 2 rigs because while they have the same torso, they mirror attributes when flipping axis’s
Timeline Tactics
One of our biggest challenges we faced was animating the intro: a 46-second short with 70 character poses, 44 rigs, and in-house subtitles. Our team pushed Rive’s file size capabilities to the max, finding unique solutions to fake certain effects while playing at runtime, leading to a final file size of 11.5MB.
Using the ideas previously discussed, we’ll dive deeper into how granular logic can be applied to a larger scale project.

To create this intro, our team mixed together classic production methods — like storyboarding, character development, and an animatic timed to the score — with technical planning to knit together a solid foundation with minimal barriers to achieve our desired aesthetic. Here is how we went from planning to implementation using organizational tactics within Rive and it’s timeline structure.
Breaking down our animatic into sequences and assigning levels of difficulty:
Example: Animate GoodGood jumping from high to low within the scene = Easy
Animate GoodGood’s peppy walk cycle on beat covering a large distance = Hard
By categorizing sequences into Easy, Medium, and Hard chunks, we were able to play to our strengths and evenly distribute the work. Denoting these categories into the Notion Task Board and assigning to an animator helped to organize who was doing what in production and where we stood with progress.
Rotating through difficulty levels helped keep the project moving. If one animator was working on a Hard sequence another could be working on a handful of Easy sequences. This ensured that we were constantly making forward progress as we reached the finish line, and for a team lift of 2 it broke up a large animation sequence into manageable chunks.
Rigging with solo layers to swap attributes and combine a sequence of poses
By sectioning out poses per beat, animators could think through rigging logic and apply it methodically to each character hierarchy. Building applicable rigs for each beat meant that animators could think through the character motion and add attribute swaps where needed without over rigging. As each beat required anywhere from one to twenty-two rigs, careful planning would be involved to ensure the rig/group of rigs could follow the vision of the animatic.
This would build framework for asset organization with the rive file, as well as contain rigs to their sequential hierarchy.


Example: WL-01_02 used the same torso but required a solo layer for arm swaps used in the first animation beat making it one rig that encapsulated two posesBreaking out animation timelines within the Rive file for the above sequenced beats:
Breaking out beats of our animatic helped organizationally contain not only the rigs that went with their applicable sequences, but also maintain organization on a more granular timeline level.
Keying down character rigs into their sequenced beats allowed for animators to tackle specific tasks and hone feedback to a specific portion of the project. This allowed us at production set up to block out key poses and timeline sections to audio to accurately mirror the animatic.
This initial logic also worked in our favor as we found early on, that while two animators could work in the same file, Rive would receive conflicting keyframe information.
However, by breaking out the sequenced animation beats, the animation team could work on chunks of the intro at different times, rather than work linearly from start to finish.

Performance Planning
Troubleshooting playback lag in such a large file forced us to take a closer look at Rive’s camera motion and loading constraints. Because With Love’s intro was animated on a singular ‘sheet of paper’ with a background comprised of 2,399 solo decorative tiles [seen below], we needed to explore different creative solutions to ensure a smooth performance with minimal lag, all while running in real time.
Unfortunately, performance is something you cannot plan, only adapt to as you go, but solid foundations help build an understanding as to how to pivot when roadblocks arise.

Intro Background: Full FidelityWhile we initially planned for our character GoodGood to hop around this sprawling artboard, we quickly realized with such a high fidelity background we were incurring large performance based problems.
When we first setup the file, we grouped the background and character art into one layer named “Camera”. We planned to animate GoodGood directly over the background layer and use this parent group to keep GoodGood in the center of the artboard.
As we began to set the first few keyframes on the this layer the entire editor froze up. The viewport would take an entire minute to update between keyframe adjustments and our runtime frame rate capped out at 6fps. There was too much vector data being moved around for it manage real-time rendering.
To solve this, we had to minimize the amount of objects being animated. We did this by keeping the character group at the top of the hierarchy—centered in the artboard—and translated the background to react to the character animation. This created the illusion that GoodGood was moving through this backdrop, when in all actuality the background was following the character around!
While this improved loading quality, we realized that the background tiles still caused substantial lag. Instead of removing the tiles, we grouped and anchored them—offsetting their position relative to the background ‘sheet of paper’—to parallax giving the illusion of moving with the camera.
These workarounds helped keep the creative integrity of the vision while also working within the boundaries of Rive and solving our file flow almost entirely. Testing out how files might perform under certain conditions and finding a way to adapt to constraints helps engineer new methods of creativity in Rive.
This brings us to the pay off of planning out a system you can understand and evolve in, the small details.
Folding in Fun
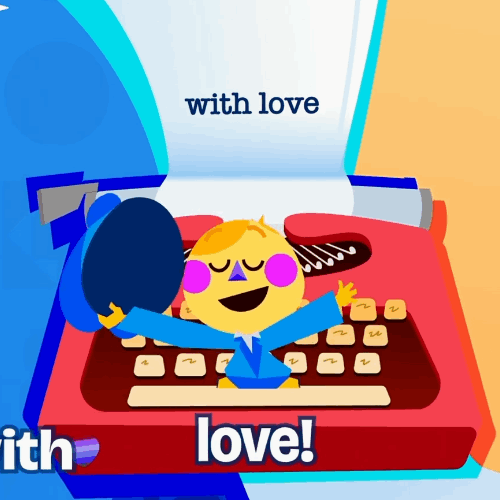
Running our animation systems in real-time allowed us to fold in personal nuances; an example of this can be seen in the intro’s first few seconds! Using runs inside of a text object, we were able to insert each user’s name — provided at app sign up — to appear during the short.
Developers could fold this in from a provided text layer and run name to create code for injectable data. Planning came into play on a more granular level when thinking about the execution of this. We had to think through page size constraints and naming parameters, needing to ensure the name fit on the ‘sheet of paper’ in the background, and denote how many characters could we allow in a name?
To achieve this within those constraints we used two runs, one for the name and one for the comma to prevent an overflow of characters spilling off of the background, scaling to fit as many letters on the layer as possible. A simple structure that took considered thought. Small moments like this prove that thoughtful design and technical planning can mix together to create a bit of immersive magic in real-time.
Forward Focus
Utilizing Rive helped bridge the gap between animator and developer, while also reminding us that creating meaningful art requires more than just creating. It requires organizing, planning, and adapting to resolve complex problems. These are responsibilities that an Animation Engineer can fill, ensuring that each project moves forward and creates an engaging experience for the user, and a flawless handoff to developers.
Example of Animators handing a perfect file off to the DevelopersBest practices often come from challenging experiences, and while we can only take away those lessons learned post-problem solving, the benefits of creating solid production pipelines help prove all that is possible.
Here’s what we know:
Rive is an amazing tool that can lift a lot of creative weight when leveraged properly.
Unconventional workarounds and evolving organizational practices may take you further than you think.
You can create seamless real-time animation by creating multiple artboards, character scaling, and reusing assets.
Facing constraints and figuring out how to keep moving within a project is the motivating factor that will keep pushing boundaries of Rive.
As any good historian can tell you, art challenges technology and inversely technology will always challenges art.
Better planning will push better practice, and with better practices we will discover more possibilities with Rive's robust systems. Whether that be in folding in small details, real-time magic making, procedural nuance, or simply keeping production on schedule: it all builds atop of itself.
For a more systematic dive into our animation, check out our “Procedural Animation in Rive: How To Engineer a Dynamic Character“ article by Eli Sawicki to look deeper into just how we put together 90,000 variations of animations in one state machine, and what we learned along the way. 〠
Procedural Animation in Rive: How To Engineer a Dynamic Character

Imagine a character that looks around naturally, reacting in real-time, with no pre-rendered sequence. How we did it? A Rive project; containing 63 state machine layers, 114 events and 245 timelines to create over 90,000 animated sequences. All within a singular artboard and a file size just shy of 10MB—no code needed. Rethink animation with us—step bey…
“Considered randomness…” - term coined by Eli Sawicki
“Practice Makes Progress” - Rugu, Notification Central & Crew Mantra