


The Power of ‘Functions’ in Rive: Learn to Automate Your Workflow
Because animating the same thing over and over is a creativity killer.

What if there was a shortcut that let you automate animations to adapt and communicate with the other areas of your project? That’s where a Rive ‘Function’ comes in! We’re putting quotes around this because it’s not a function you would see in some coding languages, such as JavaScript. It’s not even a direct feature in the editor itself! We’re simply using this term to describe the concept of creating a task with the intent of reusing it in other places.
A function could be considered the building block of a procedural system. It’s what allows you to create the myriad of connections, in Rive, that are required for context-driven animation. This workflow has completely redefined what an animator can achieve—so much so that we’ve coined a new title for it: Animation Engineer. We’ve already shared some of the reasons why this approach can be so effective in our last post “Procedural Animation in Rive: How To Engineer a Dynamic Character”, but now let’s explore exactly how to achieve this.
We’ve done our best to make this approachable to anyone who is somewhat familiar with Rive, so feel free to open your editor at home and follow along!
A ‘Function’ in Rive
There’s no hidden drop-down that reads “create a function” in the editor. What we’re referring to is a technique using listeners and events to effect inputs. This can be set up to simply play an animation, like in the example below, or you can weave multiple functions together to create more complex, procedural systems, like GoodGood “3.0”.
Follow this step-by-step guide or “Remix” the example project here.
Connect Task to Input
Animate a timeline, set it to One-Shot.
If you need some inspiration, we did a ball bounce in the example project!

Example timeline animation
Create a trigger input, an event and a listener.
Rive Docs (Inputs) | Rive Docs (Events) | Rive Docs (Listeners)
Set up a state machine layer to play the animated timeline, whenever the trigger input is fired. (steps below)
1. Add your animated timeline, two times, to a state machine layer.
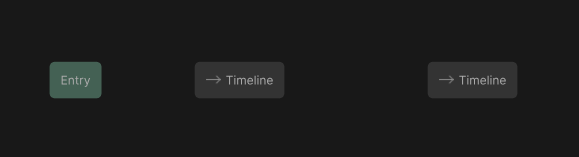
Step 1 2. Create a transition from the ‘Entry’ state to one of the animation states. Also, create transitions between the two animation states.
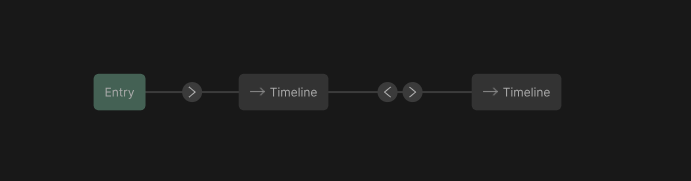
Step 2 3. Select the two transitions, between the animation states, and set both conditions to the trigger input.
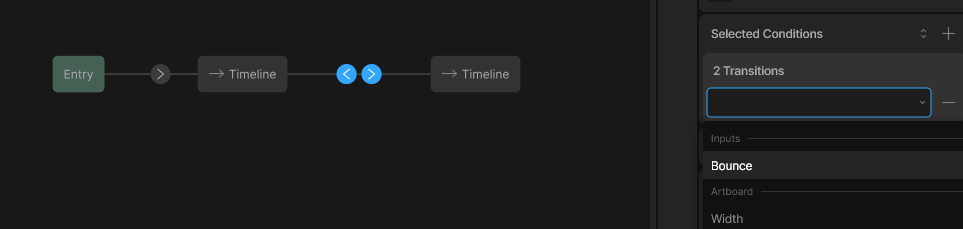
Step 3


At this point, your animation should be playing every time you fire that trigger input. If so, you’ve built the task part of the ‘Function’ — good job 👍! We used a trigger input in this example, but you can use any of the input types for this technique. This input should be managing whatever it is you need that function to do in your state machine, via conditions.
Make Input “Public”
Now, we’ll make this input available to the other layers of the state machine through an event, using a listener.
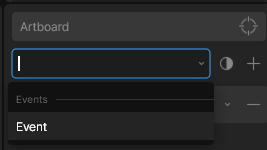
Target the listener to the artboard that hosts the input.
Set the action of the listener to the event.
Rive Docs (Listeners - Action)
Step 2

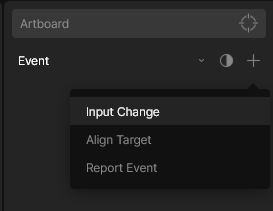
Add an ‘Input Change’ “Listener Action” to the listener.
Rive Docs (Listeners - Listener Action)

Step 3
Set the input of the “Listener Action” to the trigger input.

Step 4
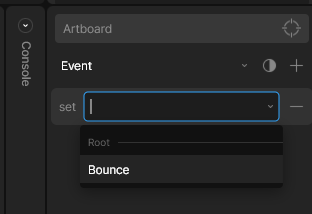
That event, when fired, should now fire that input. In this example, that input is driving those conditions that play your animation in the state machine layer. With the event connected to the input, by the listener, we’re now able to use this ‘function’ in other layers of the state machine.
How to Call the ‘Function’
With everything set up, it’s time to use the function! There are a few ways to do this:
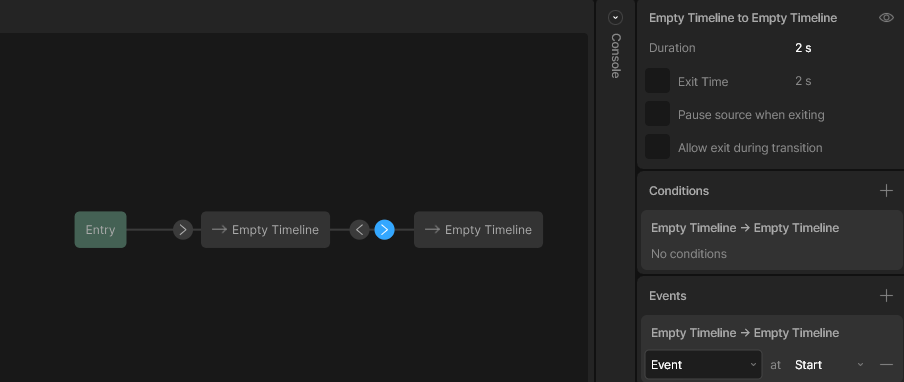
Fire an event from a transition in the state machine.

Selected transition, Highlighted ‘Event’ This is how the example project was set up. “Remix” to view. Once in the project, check inside “Layer 2” of the state machine. See the ‘Events’ tab while selecting a condition between both the animation states. Also, you can define when it will fire the event, at either the start or end of the transition duration.
Fire an event from an animation state in the state machine.
Almost identical to the first method, except it’s on a state, rather than a transition.
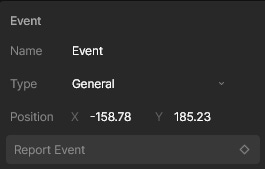
Keyframe an event to fire from a timeline.

‘Report Event’ Button 1. Open a timeline.
2. Move the play head where you want the event to fire.
3. Select the event from the stage.
4. In the inspector, click the ‘Report Event’ button to set the keyframe.
Examples of ‘Functional’ Animation
Now that you know how to set up a ‘Function’ inside Rive, let’s explore some specific examples of how we’ve been able to use this technique in our own projects.
We have a bunch of auxiliary triggers in our “3.0” GoodGood procedural system. These are universal functions our animators can tap into to enhance a sequence. They usually involve animations that reoccur and effect layers that remain on-screen between pose transition. It helps to automate and standardize parts of a system that are reused a lot so you’re not having to go back and animate the same thing hundreds of times. Also, this allows us to use state machine randomization for unique sequences we couldn’t have created otherwise.
Camera Shake
Using the same method as the first guide, we were able to build a function that injects a unique camera shake anywhere in an animation we wanted. So instead of our character, GoodGood, moving the desk alone, the entire room could join in too! This is something that can be built in any project; feel free to bring this into your own workflow.
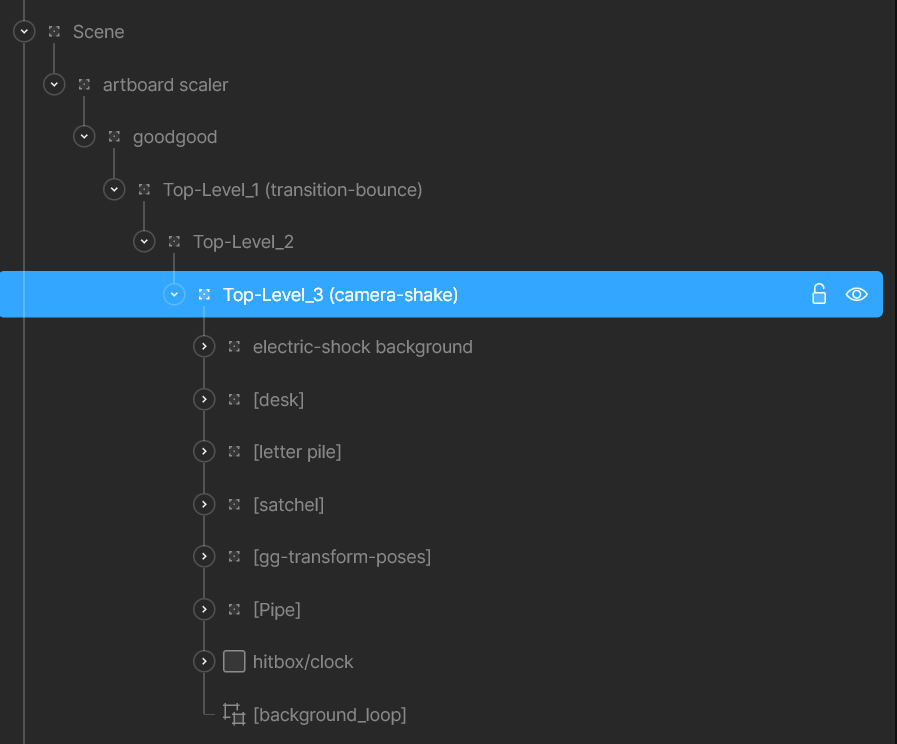
Allocate a group at the top-level of the project to exclusively be translated by this function.
This is what gives us access to move the scene around. Prevent layer conflicts, by making sure you don’t animate the group anywhere else in the state machine!

Highlighted ‘Top-Level_3’ Group
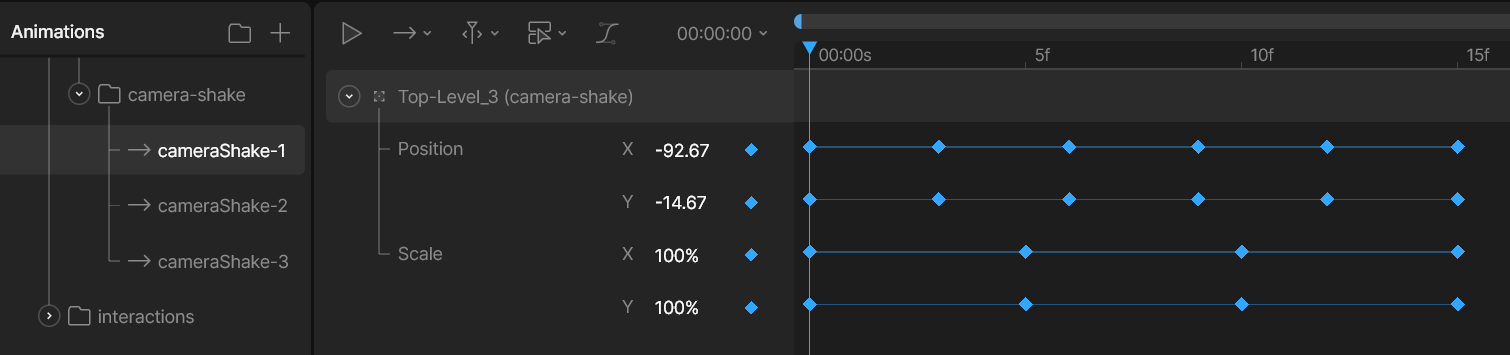
Animate the layer “shaking” on a few timelines, use some variety with some subtle and others more pronounced.
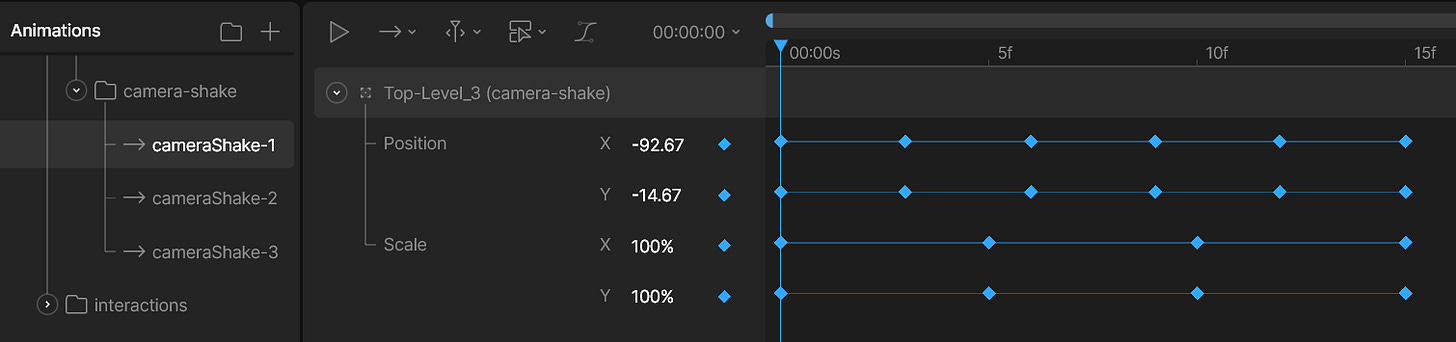
Multiple Timelines (left), ‘cameraShake-1’ Key frames (right) Create a new state machine layer and add all your timelines.
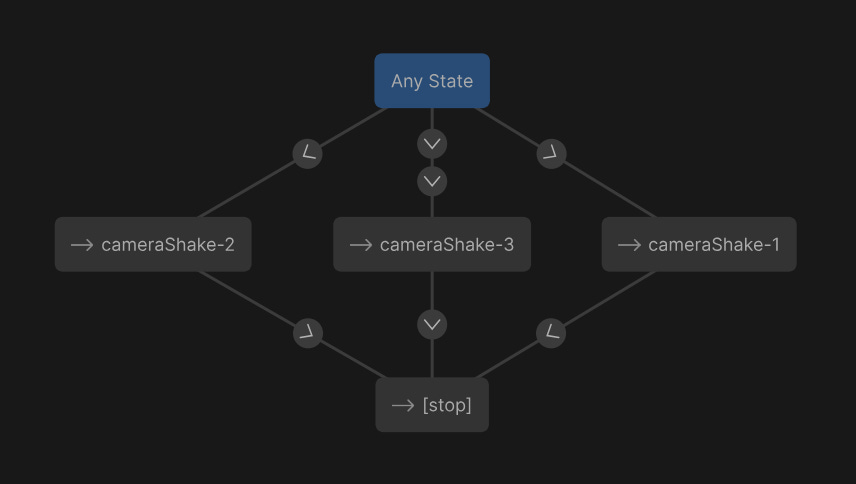
From ‘Any State’ create transitions to each timeline with ‘randomization exit’ turned on.
Add a transition from each, at 100% Exit Time, into a blank timeline.
This allows Rive’s randomization to go into the same timeline again. Otherwise, when deciding a transition it wouldn’t include the active timeline as an option. The blank “[stop]” timeline is optional because of this.

‘Camera Shake’ State Machine Layer
Set the conditions on transition coming from ‘Any State’ to an input trigger “camera-shake”.
(Optional): Create multiple conditions and inputs for ‘subtle’ and ‘large’ camera shakes that only transition into the related timelines. That is what the second transition going into “cameraShake-3” is for.
Set up the inputs as functions like from before.
Once it’s all ready you can apply the effect anywhere in the state machine or timelines. Now, go add that extra layer of excitement to those big moments in your project!
Keyboard Bounce
This is another great example on how to streamline a repeated animation in your project! We have a keyboard on the desk in GoodGood’s mailroom, he often interacts with it. After animating a few of these poses, it was obvious we needed to automate this process.
Animate a few variations of the keyboard slightly moving around on multiple timelines.
Similar to the ‘camera shake’, create a state machine layer that randomizes between each timeline from an input trigger.
For this example, we put a short duration on the transitions so they could seamlessly tween between the bounces.
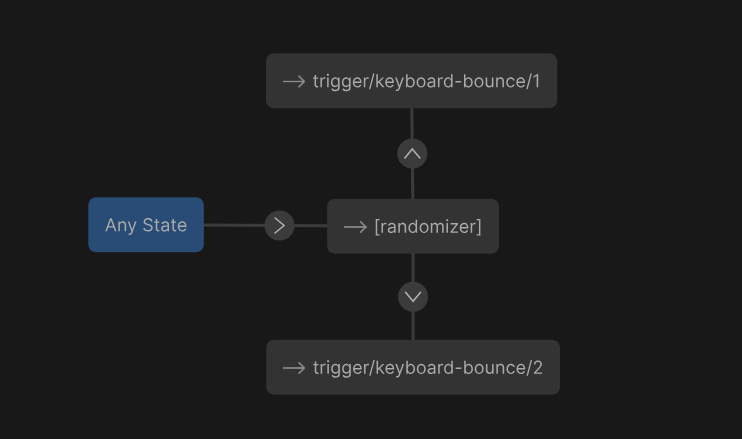
So now, instead of animating every keyboard bounce we could just call this function and get a randomized bounce wherever we wanted!
Let’s take this further and see how we layered it within another function to create a dynamic keyboard typing loop based on a boolean. We won’t go step-by-step into everything that made this happen, but by exploring the concept of combining functions you can create engaging systems.
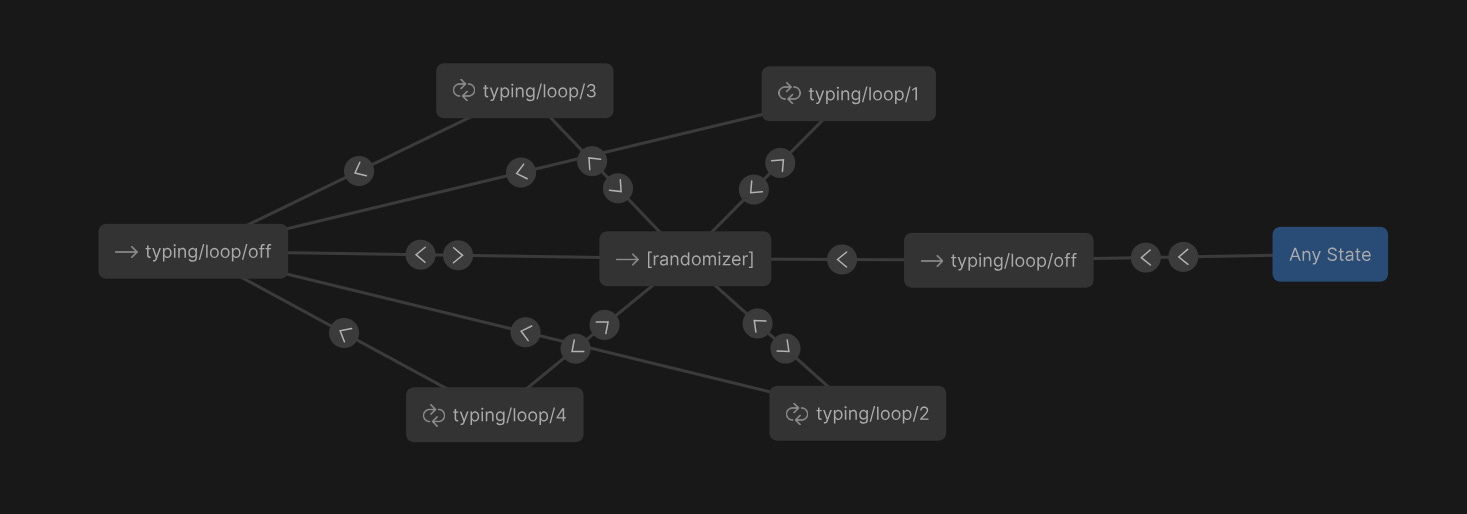
We created a function we could turn on/off to tell our system when we wanted GoodGood to type. This was controlled through two events that would set the boolean true or false. Both of these events would then be set inside a pose that determines the time where he’s typing. Within each typing loop timeline was a series of animated arm rigs and events firing the previous keyboard bounce function.
These typing animations wouldn’t simply play whenever the boolean was true, as that would become repetitive if he typed forever. To add a layer of depth to the system, it would turn off the typing loops whenever his eyes were glancing to the right to simulate him “taking a break” and thinking before typing again. These short pauses added variation and character in a way that only required us to establish when he was “allowed” to type, letting the system control the rest.
This incorporated the keyboard bounce function with an eye glancing function to create a dynamic, procedural system. To see it in action download the app here. You can also watch GoodGood working at his desk in GoodGood Beats to Chill & Write Letters To..., check it out on YouTube!
Why build only “Production-Ready Graphics” if you could do the production in-editor too?
Our platform shows how these little-known techniques in Rive can be leveraged, by individuals and organizations, to engineer complete, no-code solutions for websites, apps, and games. Through this workflow, Rive empowers the creative-mind with the ability to see a digital product to the very end—never a handoff. 〠
Procedural Animation in Rive: How To Engineer a Dynamic Character

Imagine a character that looks around naturally, reacting in real-time, with no pre-rendered sequence. How we did it? A Rive project; containing 63 state machine layers, 114 events and 245 timelines to create over 90,000 animated sequences. All within a singular artboard and a file size just shy of 10MB—no code needed. Rethink animation with us—step bey…